Monday, August 25, 2025

Complete Electrical Panel Upgrade Guide: Safety, Cost & Benefits 2025


Complete Electrical Panel Upgrade Guide

Your home's electrical panel serves as the central nervous system of your entire electrical network. When it's time for an electrical panel upgrade, understanding the process, costs, and benefits can save you money while protecting your family's safety. This comprehensive guide walks you through everything you need to know about modernizing your home's electrical heart.

Professional electrician performing electrical panel upgrade installation

Why Your Home Needs an Electrical Panel Upgrade

Modern homes demand significantly more electrical power than houses built decades ago. From smart home devices to electric vehicle chargers, today's electrical needs often exceed what older panels can safely handle. An electrical panel upgrade isn't just about convenience—it's about safety, efficiency, and protecting your investment.

Understanding Your Current Electrical System for Electrical Panel Upgrade

Most homes built before 1990 feature electrical panels that struggle to meet today's power demands. These older systems often include:

  • Fuse boxes instead of circuit breakers
  • 100-amp service when 200-amp is now standard
  • Outdated wiring that doesn't meet current electrical codes
  • Insufficient circuits for modern appliances

Recognizing these limitations helps homeowners understand when an electrical panel upgrade becomes necessary rather than optional.

Clear Warning Signs You Need an Electrical Panel Upgrade

Modern electrical panel with advanced safety features after upgrade

Frequent Circuit Breaker Trips

When your circuit breakers trip repeatedly, your electrical system is telling you it's overloaded. This safety feature prevents dangerous overheating, but constant tripping indicates your panel can't handle your home's electrical demands. An electrical panel upgrade resolves this issue by providing adequate capacity for your electrical needs.

Flickering or Dimming Lights

Lights that flicker when appliances start or dim throughout your home signal electrical supply issues. While sometimes caused by loose connections, persistent lighting problems often indicate your panel lacks sufficient capacity. Professional electricians can determine whether an electrical panel upgrade will solve these frustrating electrical symptoms.

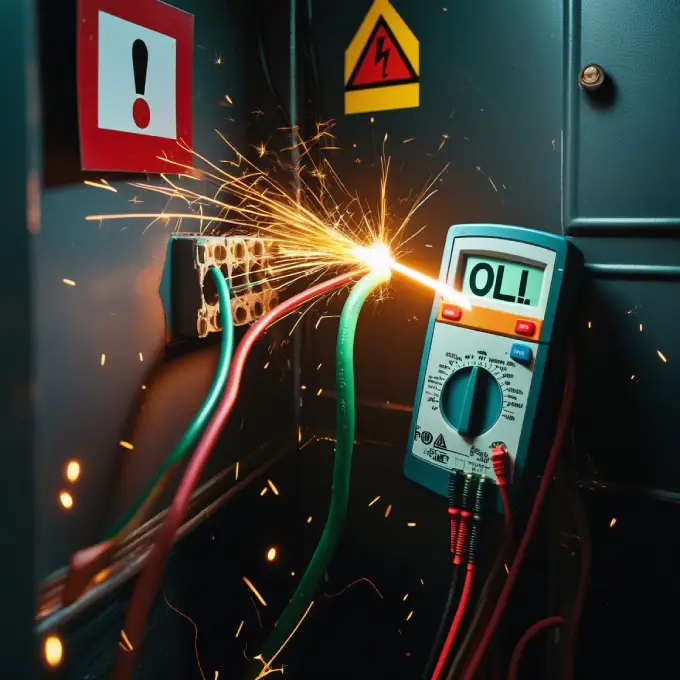
Burning Smells or Scorch Marks

Any burning odor near your electrical panel requires immediate attention. Scorch marks around outlets, switches, or the panel itself indicate dangerous overheating. These warning signs often precede electrical fires, making an electrical panel upgrade a critical safety measure.

Using Multiple Extension Cords

Homes without enough outlets force residents to rely on extension cords and power strips. This temporary solution becomes dangerous when overused, creating fire hazards and electrical overload risks. An electrical panel upgrade allows for additional circuits and outlets, eliminating dangerous electrical dependencies.

Types of Electrical Panel Upgrade Options

Standard Residential Panel Upgrades

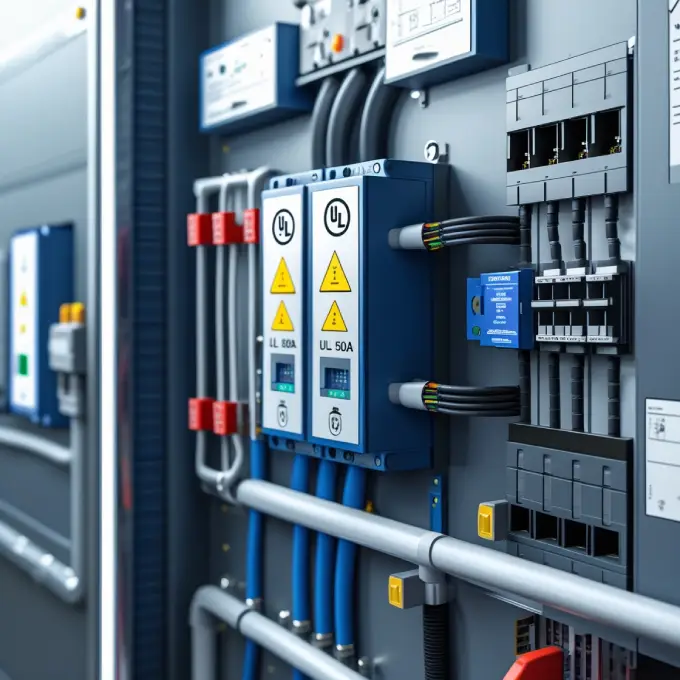
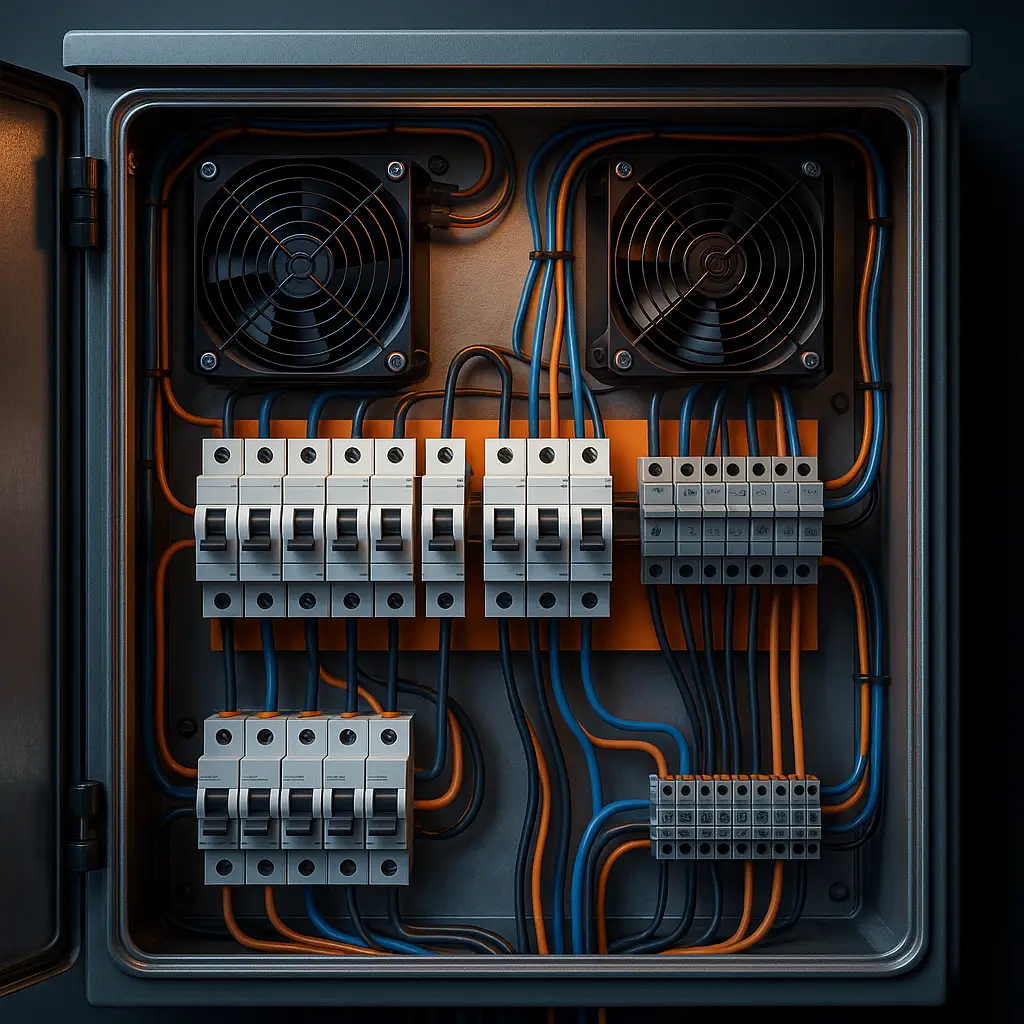
Most homeowners benefit from upgrading to a 200-amp electrical panel, which provides ample capacity for modern electrical needs. This electrical panel upgrade typically includes:

  • New main breaker panel
  • Updated circuit breakers
  • Proper grounding systems
  • Code-compliant wiring connections

Smart Panel Technology

Modern electrical panel upgrade options include smart panels that offer remote monitoring, energy usage tracking, and individual circuit control through smartphone apps. These advanced systems provide unprecedented control over your home's electrical consumption.

Subpanel Installations

Sometimes an electrical panel upgrade includes adding subpanels for specific areas like workshops, pool equipment, or home additions. Subpanels distribute electrical load more efficiently while maintaining centralized control.

The Electrical Panel Upgrade Process Explained

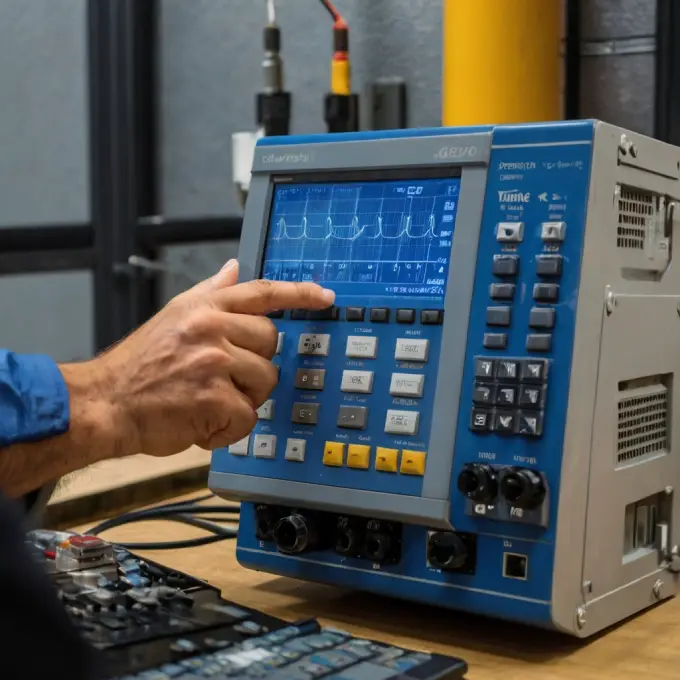
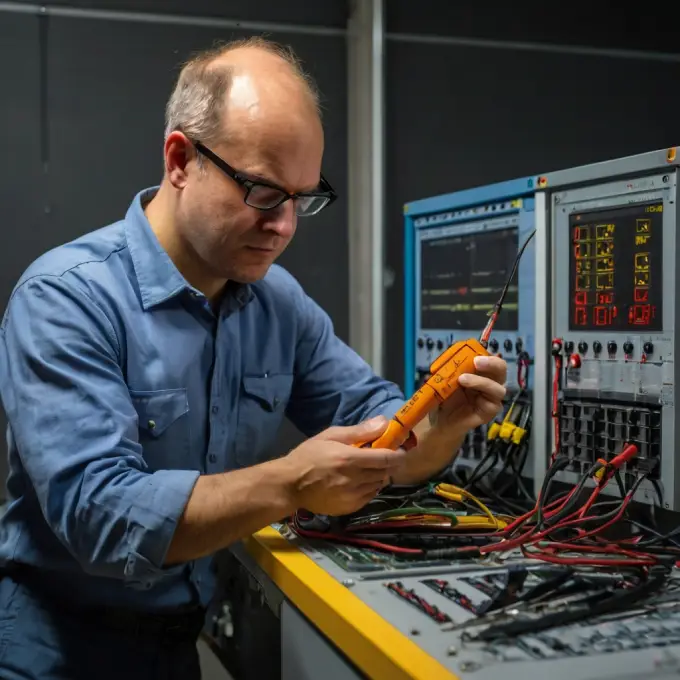
Initial Electrical Assessment for Electrical Panel Upgrade

Professional electricians begin every electrical panel upgrade with comprehensive electrical system evaluation. This assessment includes:

  • Current panel capacity analysis
  • Electrical load calculations
  • Code compliance review
  • Safety hazard identification

Permit Requirements and Inspections

Most jurisdictions require permits for electrical panel upgrade projects. Licensed electricians handle permit applications and coordinate required inspections, ensuring your upgrade meets local electrical codes and safety standards.

Installation Timeline

A typical electrical panel upgrade takes one to two days, depending on complexity. The process involves:

  1. Coordinating utility company power disconnection
  2. Removing old panel and components
  3. Installing new panel and breakers
  4. Connecting existing circuits
  5. Testing all electrical connections
  6. Final inspection approval

Understanding Electrical Panel Upgrade Costs

Factors Affecting Electrical Panel Upgrade Expenses

Several variables influence electrical panel upgrade costs:

  • Current electrical system condition
  • Panel capacity requirements (100-amp vs 200-amp)
  • Local labor rates and permit fees
  • Additional electrical work needed
  • Accessibility and installation complexity

Average Investment Ranges

While costs vary significantly by location and project scope, most electrical panel upgrade projects range from $1,500 to $4,000. This investment includes materials, labor, permits, and inspections. Complex upgrades requiring extensive rewiring may cost more.

Return on Investment Benefits

An electrical panel upgrade provides excellent return on investment through:

  • Increased home value and marketability
  • Reduced electrical fire risks
  • Lower insurance premiums
  • Improved electrical efficiency
  • Future electrical expansion capability

Safety Benefits of Professional Electrical Panel Upgrade

Fire Prevention Advantages

Outdated electrical panels cause thousands of house fires annually. An electrical panel upgrade dramatically reduces fire risks by:

  • Eliminating overloaded circuits
  • Providing proper overcurrent protection
  • Meeting current electrical safety codes
  • Improving overall electrical safety

Enhanced Electrical Protection

Modern panels include advanced safety features like AFCI (Arc Fault Circuit Interrupter) and GFCI (Ground Fault Circuit Interrupter) protection. These technologies, standard in every electrical panel upgrade, detect electrical faults and prevent electrocution or fires.

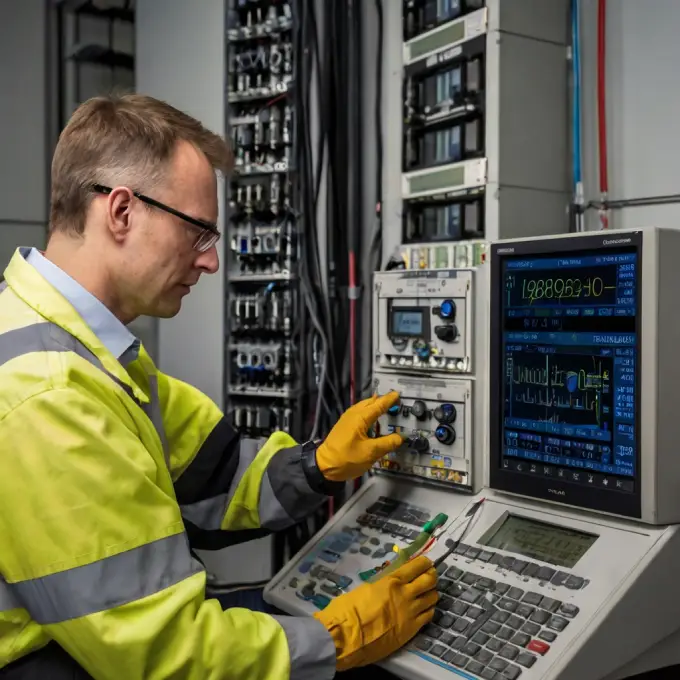
Choosing the Right Electrical Contractor

Licensing and Insurance Verification

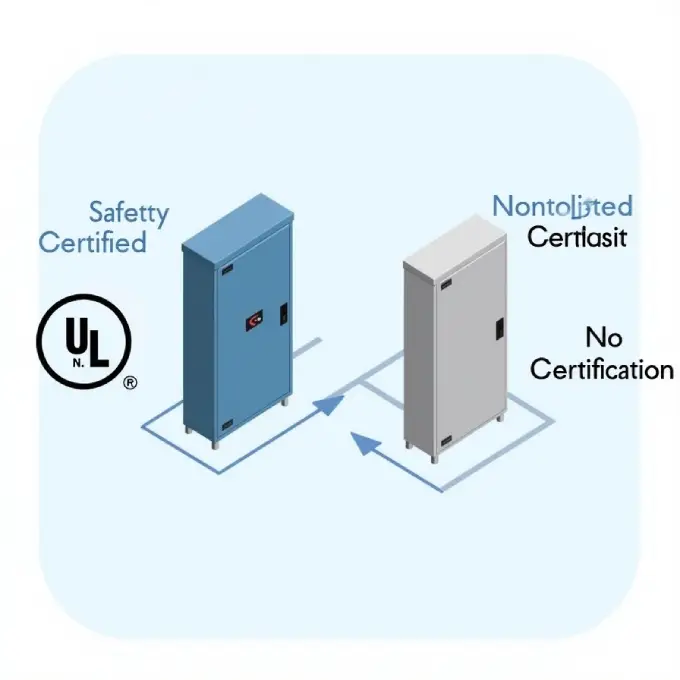
Always verify that electricians performing your electrical panel upgrade carry proper licensing and insurance. Licensed professionals understand local codes, safety requirements, and proper installation techniques essential for safe electrical work.

Experience with Panel Upgrades

Choose electricians with extensive electrical panel upgrade experience. Experienced professionals complete projects efficiently while identifying potential complications before they become expensive problems.

Warranty and Service Guarantees

Reputable electrical contractors provide warranties on electrical panel upgrade work, demonstrating confidence in their craftsmanship and materials. These guarantees protect your investment and ensure long-term satisfaction.

Preparing for Your Electrical Panel Upgrade

Pre-Installation Preparations

Before your electrical panel upgrade, complete these preparatory steps:

  • Clear panel area access
  • Backup important electronics
  • Plan for temporary power outages
  • Coordinate with family members about electrical disruption

Post-Installation Maintenance

After your electrical panel upgrade, maintain your investment through:

  • Annual electrical inspections
  • Prompt attention to electrical issues
  • Regular circuit breaker testing
  • Professional electrical system maintenance

Future-Proofing Your Electrical System

Planning for Electrical Growth

A well-planned electrical panel upgrade anticipates future electrical needs like:

  • Electric vehicle charging stations
  • Home automation systems
  • Pool or spa installations
  • Workshop or garage electrical needs

Energy Efficiency Considerations

Modern electrical panels support energy-efficient technologies, making your electrical panel upgrade an investment in sustainable living. Compatible systems include solar panels, battery backup systems, and smart home energy management.

Conclusion: Investing in Electrical Safety and Efficiency

An electrical panel upgrade represents one of the most important investments you can make in your home's safety, efficiency, and value. From preventing electrical fires to supporting modern electrical demands, this upgrade provides benefits that extend far beyond simple convenience.

Don't wait for electrical problems to force your hand. Proactive electrical panel upgrade planning allows you to choose timing, contractors, and features that best serve your needs and budget. Contact licensed electrical professionals today to assess your home's electrical system and discuss upgrade options that will keep your family safe while supporting your modern lifestyle.

Remember, electrical work requires professional expertise. While this guide provides valuable information about electrical panel upgrade benefits and processes, always consult qualified electricians for accurate assessments and safe installation services.

Sunday, August 24, 2025

Best Small Enclosures for IoT & Raspberry Pi Projects: Complete 2025 Guide

 When building IoT devices or Raspberry Pi projects, choosing the right housing can make or break your creation. Small Enclosures for IoT & Raspberry Pi need to protect delicate electronics while maintaining accessibility for modifications and repairs. Whether you're creating a weather station, home automation controller, or industrial sensor. the enclosure you select will determine your project's longevity and reliability.

Collection of small enclosures for IoT projects including weatherproof and clear cases

Finding the perfect balance between protection, size, and functionality isn't always straightforward. This comprehensive guide examines the best small enclosures available today. helping you make an informed decision for your next electronics project.

Why Enclosure Selection Matters for IoT Projects

Your IoT device's enclosure serves as the first line of defense against environmental hazards. Dust, moisture, temperature fluctuations, and physical impact can destroy unprotected electronics within hours of deployment. Small enclosures for IoT projects must provide adequate protection while allowing necessary connections and heat dissipation.

Beyond protection, the right enclosure enhances your project's professional appearance and user experience. A well-chosen case can transform a breadboard prototype into a market-ready product, while poor enclosure selection can doom even the most innovative design.

Top Small Enclosures for IoT Projects

Top Small Enclosures for IoT Projects

Weatherproof IP65-Rated Cases

For outdoor IoT applications, weatherproof enclosures provide essential protection against rain, snow, and dust. These small enclosures for IoT projects typically feature rubber gaskets, cable glands, and corrosion-resistant materials.

The Hammond 1554 series offers excellent value with its polycarbonate construction and multiple size options. These enclosures include pre-molded mounting bosses that perfectly accommodate Raspberry Pi boards and similar single-board computers. The transparent lid allows visual inspection of status LEDs without opening the case.

Bud Industries' NEMA-rated enclosures provide superior protection for harsh environments. Their aluminum construction offers better heat dissipation than plastic alternatives, crucial for power-hungry IoT devices. The powder-coated finish resists corrosion while maintaining a professional appearance.

Compact Desktop Enclosures

Indoor IoT projects benefit from smaller, aesthetically pleasing enclosures that blend into home or office environments. These cases prioritize easy access and cable management over weather resistance.

The OKW Minitec series combines compact dimensions with excellent build quality. These small enclosures for IoT projects feature snap-together assembly, eliminating the need for screws while maintaining secure closure. The ribbed design provides additional structural strength and heat dissipation surface area.

Serpac's plastic enclosures offer remarkable versatility with their modular design. Multiple cases can be stacked or mounted side-by-side, perfect for expandable IoT systems. The wide variety of available colors helps with device identification in multi-sensor installations.

Clear Polycarbonate Options

Transparent enclosures allow visual monitoring of your IoT device's operation while providing protection from dust and accidental contact. These cases work particularly well during development phases when frequent modifications are necessary.

The Polycase QP series provides crystal-clear visibility with excellent impact resistance. These small enclosures for IoT projects include removable mounting feet and multiple knockout options for custom cable routing. The optical clarity remains unchanged even after extended UV exposure.

Essential Features to Consider

Size and Internal Layout

Measuring your components accurately prevents costly mistakes. Allow extra space for heat dissipation, cable routing, and future modifications. Many makers underestimate the space required for proper wire management, leading to overcrowded enclosures that trap heat and complicate troubleshooting.

Cable Management Solutions

Quality enclosures provide multiple options for cable entry and exit. Cable glands create weatherproof seals for outdoor applications, while knockout panels offer flexibility for custom installations. Consider both current and future connectivity requirements when evaluating cable management features.

Mounting Options

Your IoT device's deployment location determines necessary mounting features. Wall-mount enclosures save space in cramped installations, while panel-mount options integrate seamlessly into existing equipment. DIN rail compatibility proves valuable for industrial applications.

Heat Dissipation

Electronics generate heat during operation, and small enclosures can quickly become thermal bottlenecks. Ventilation slots, heat sink mounting provisions, and thermally conductive materials help maintain safe operating temperatures. Fanless designs reduce complexity but require careful thermal planning.

Installation Best Practices

Proper installation maximizes your enclosure's protective capabilities. Use appropriate gaskets and sealants for outdoor applications, ensuring all penetrations maintain the specified IP rating. Indoor installations should prioritize accessibility and cable organization.

Create service loops in external cables to prevent water infiltration through capillary action. Position cable entries on the enclosure's bottom or sides rather than the top whenever possible. This simple step dramatically reduces water intrusion risk.

Sizing Guidelines for Common IoT Platforms

Raspberry Pi 4 projects require minimum internal dimensions of 95mm x 70mm x 30mm, but 120mm x 80mm x 40mm provides comfortable working space. Arduino-based projects often fit in smaller enclosures, typically 80mm x 60mm x 25mm or larger depending on shield requirements.

ESP32 and similar microcontroller boards work well in compact enclosures measuring 60mm x 40mm x 20mm or larger. Always account for antenna placement requirements, as metal enclosures can significantly reduce wireless performance.

Budget-Friendly Alternatives

Generic plastic project boxes offer significant cost savings for prototype work or non-critical applications. While these lack the refinement of name-brand enclosures, they provide adequate protection for many indoor IoT projects.

3D printing enables completely custom enclosures tailored to specific requirements. Modern filaments like PETG and ABS provide excellent durability and chemical resistance. Consider printing costs and time when evaluating this option against commercial alternatives.

Making Your Final Decision

The best small enclosures for IoT projects balance protection, accessibility, and cost while meeting your specific application requirements. Outdoor projects demand weatherproof construction and UV resistance, while indoor devices can prioritize aesthetics and easy access.

Consider your project's entire life cycle, from initial development through long-term deployment. An enclosure that accommodates future modifications and repairs will save time and money throughout your IoT device's operational life.

Investing in quality enclosures for IoT & Raspberry Pi, protects your electronics investment and ensures reliable operation. The small additional cost of a proper case pays dividends through reduced maintenance, improved reliability, and professional appearance that enhances user confidence in your IoT solution.

Military Grade Enclosures – MIL-STD-810G Explained: Durability, Testing & Applications

military grade enclosure

When it comes to durability in extreme environments, military grade enclosures stand out as the gold standard. These rugged housings are designed to protect sensitive electronics from shock, vibration, temperature extremes, and more. But what exactly makes an enclosure MIL-STD-810G certified? In this guide, we’ll break down the MIL-STD-810G standard, its testing procedures, and where these ultra-durable enclosures are used.

What is MIL-STD-810G?

military grade enclosure3

MIL-STD-810G is a U.S. military standard that defines rigorous testing methods to ensure equipment can withstand harsh environmental conditions. It covers a wide range of stressors, including:

  • Temperature Extremes (–50°C to +70°C)
  • Shock & Vibration Resistance
  • Humidity & Salt Fog Exposure
  • Water & Dust Ingress (IP Ratings)
  • Altitude & Pressure Changes

Products that meet this standard are proven to perform reliably in defense, aerospace, industrial, and field operations.

How Are Military-Grade Enclosures Tested?

To achieve MIL-STD-810G compliance, enclosures undergo extensive testing:

  1. Drop & Impact Testing – Simulates rough handling and battlefield conditions.
  2. Temperature Cycling – Ensures functionality in extreme heat and cold.
  3. Vibration Testing – Mimics transport in vehicles, aircraft, and heavy machinery.
  4. Water & Dust Resistance – Validates protection against harsh weather (IP67/IP68).
  5. Explosive Atmosphere Testing – Ensures safety in volatile environments.

Applications of MIL-STD-810G Enclosures

military grade enclosure2

These rugged enclosures are used in critical industries, including:
✔ Military & Defense – Communication systems, drones, and field equipment.
✔ Aerospace & Aviation – Avionics, flight data recorders, and navigation systems.
✔ Industrial & Manufacturing – Harsh factory environments and automation.
✔ Emergency Response – Firefighting, disaster recovery, and search & rescue tech.

Why Choose MIL-STD-810G Certified Enclosures?

  • Reliability – Built to last in extreme conditions.
  • Long-Term Cost Savings – Reduced failure rates mean lower replacement costs.
  • Versatility – Suitable for multiple high-stress applications.

Conclusion

MIL-STD-810G military-grade enclosures are engineered for maximum durability, making them essential for defense, aerospace, and industrial applications. By understanding the testing behind this standard, businesses can make informed decisions when selecting ruggedized solutions.

Looking for MIL-STD-810G compliant enclosures? Ensure your equipment survives the toughest conditions with certified protection.

UL 508A Panel Standards: A Complete Guide to Compliance & Safety

 Industrial control panels are critical for automation and machinery operations, but they must meet strict safety standards. UL 508A is the benchmark for industrial control panel compliance in North America. If you're an engineer, electrician, or manufacturer, understanding these standards is essential for safety, reliability, and legal compliance.

UL 508A panel standard

In this guide, we’ll break down:
✔ What UL 508A standards are
✔ Key compliance requirements
✔ Common mistakes to avoid
✔ Benefits of UL 508A certification

What Are UL 508A Panel Standards?

ul508a standard

UL 508A is a safety standard developed by Underwriters Laboratories (UL) for industrial control panels. It ensures that panels are designed, constructed, and tested to minimize electrical hazards like short circuits, overheating, and fires.

Panels certified under UL 508A are widely accepted in the U.S. and Canada, making them a requirement for many industrial applications.

UL 508A Panel Standards Compliance Requirements

To meet UL 508A standards, control panels must adhere to strict guidelines, including:

1. Proper Component Selection
  • Only UL-listed or recognized components should be used.
  • Components must be rated for the panel’s voltage and current.
2. Wiring & Circuit Protection
3. Clear Labeling & Documentation
4. Spacing & Ventilation
5. Grounding & Bonding
  • Proper grounding prevents electrical shocks.
  • All conductive parts must be bonded to avoid potential differences.

Common Mistakes to Avoid

❌ Using non-UL-listed components
❌ Incorrect wire sizing or poor routing
❌ Missing safety labels or documentation
❌ Inadequate spacing leading to overheating

Benefits of UL 508A Certification

ul508a panelboard

✔ Enhanced Safety – Reduces fire and electrical hazards.
✔ Regulatory Compliance – Meets OSHA and NEC requirements.
✔ Market Acceptance – Required by many industries and inspectors.
✔ Lower Liability Risks – Minimizes legal and insurance issues.

Final Thoughts

Complying with UL 508A panel standards ensures safety, reliability, and regulatory approval for industrial control panels. Whether you're designing, building, or maintaining these systems, following these guidelines is crucial.

Need help with UL 508A compliance? Consult a certified panel builder or testing lab to ensure your systems meet the highest safety standards.

Mastering IEC 60890: A Complete Guide to Temperature Rise Calculation in Electrical Enclosures

 Understanding the temperature rise calculation IEC 60890 is crucial for engineers and designers working with electrical enclosures. The IEC 60890 standard provides a method to estimate temperature increases inside electrical panels, ensuring safe operation and preventing overheating. This guide explains the key principles, formulas, and steps to perform accurate calculations while staying compliant.

Temperature Rise Calculation

Why Temperature Rise Calculation Matters

Electrical enclosures must dissipate heat efficiently to avoid component failure. Excessive temperature rise can lead to:

The IEC 60890 standard offers a systematic approach to predict and control temperature rise, ensuring reliability and safety.


Key Factors in IEC 60890 Temperature Rise Calculation

Temperature Rise Calculation inside enclosure
1. Heat Dissipation Inside the Enclosure

The standard considers:

  • Power losses from installed equipment
  • Enclosure material (steel, aluminum, etc.)
  • Surface area for natural cooling
2. Ambient Temperature Influence

The surrounding temperature affects internal heat buildup. The calculation adjusts for different environmental conditions.

3. Ventilation and Cooling Methods
  • Natural convection (passive cooling)
  • Forced ventilation (fans, air conditioning)

Step-by-Step Temperature Rise Calculation per IEC 60890

Temperature Rise Calculation 3
Step 1: Determine Total Power Loss (P)

Sum the heat generated by all components inside the enclosure.

Step 2: Calculate Effective Cooling Surface Area (A)

The enclosure’s surface area impacts heat dissipation.

Step 3: Apply the IEC 60890 Formula

The standard provides empirical formulas to estimate temperature rise

IEC 60890 Formula

Where:

  • k = Material coefficient
  • x = Exponent based on enclosure type
Step 4: Verify Against Maximum Allowable Temperature

Compare the calculated ΔT with component ratings to ensure compliance.


Common Mistakes to Avoid

  • Ignoring non-uniform heat distribution
  • Overlooking solar radiation effects (for outdoor enclosures)
  • Incorrect material thermal conductivity values

Conclusion

Accurate temperature rise calculation IEC 60890 ensures electrical enclosures operate safely and efficiently. By following the standard’s guidelines, engineers can prevent overheating, extend equipment life, and meet regulatory requirements.

For complex installations, consider thermal simulation software for precise analysis.

IEC STANDARD DOWNLOAD

Friday, August 22, 2025

UL-Listed vs. Non-Listed Enclosures: Safety, Compliance & Cost Compared

 When selecting electrical enclosures for your project, one critical decision is whether to choose UL-Listed vs. non-Listed enclosures. Understanding the differences between these two types can impact safety, compliance, and performance.

In this guide, we’ll break down the key differences between UL-Listed and non-Listed enclosures, helping you make an informed decision for your application.

What Does UL-Listed Mean?

ul listed enclosures

UL (Underwriters Laboratories) is a globally recognized safety certification organization. A UL-Listed enclosure means it has undergone rigorous testing to meet specific safety standards for electrical equipment.

Benefits of UL-Listed Enclosures:

✔ Safety Assurance – Tested for fire resistance, impact protection, and environmental durability.
✔ Compliance with Codes – Required by many local and national electrical codes (e.g., NEC).
✔ Insurance & Liability – Many insurers prefer UL-certified products to reduce risk.
✔ Market Trust – UL certification enhances credibility with customers and inspectors.

What Are Non-Listed Enclosures?

Non-Listed enclosures have not been evaluated by UL or other nationally recognized testing laboratories (NRTLs). While they may still be functional, they lack verified compliance with safety standards.

Considerations for Non-Listed Enclosures:

⚠ Lower Cost – Often cheaper due to the absence of certification expenses.
⚠ Potential Risks – May not meet fire, electrical, or environmental safety standards.
⚠ Limited Acceptance – Some projects (especially commercial or industrial) may reject non-certified enclosures.

Key Differences Between UL-Listed and Non-Listed Enclosures

FeatureUL-Listed EnclosuresNon-Listed Enclosures
Safety CertificationTested and certified by ULNo third-party certification
ComplianceMeets NEC, OSHA, and local codesMay not meet required standards
DurabilityVerified for impact, weather, and fire resistanceNo guaranteed performance testing
CostHigher due to testing & certificationTypically lower
AcceptanceWidely accepted in commercial/industrial useMay be restricted in certain applications

When Should You Use UL-Listed vs. Non-Listed Enclosures?

Choose UL-Listed Enclosures If:
  • Your project requires compliance with electrical codes (NEC, OSHA).
  • You need enclosures for harsh environments (outdoor, industrial, or hazardous locations).
  • Insurance or inspectors demand certified products.
Non-Listed Enclosures May Be Suitable If:
  • The application is low-risk (e.g., non-critical indoor use).
  • Budget constraints outweigh certification needs.
  • The enclosure is used in a non-regulated setting (e.g., DIY projects).
Final Thoughts

Choosing between UL-Listed vs. non-Listed enclosures depends on safety requirements, compliance needs, and budget. While UL-Listed enclosures provide verified safety and regulatory compliance, non-Listed options may work for less critical applications.

Before making a decision, always check local codes and project specifications to ensure the right choice for your needs.

5 Common Electrical Enclosure Mistakes That Could Cost You Thousands

Protecting electrical components from environmental hazards and ensuring safe operation. However, mistakes in their selection, installation, or maintenance can lead to equipment failure, safety hazards, and costly repairs. In this article, we’ll explore five common electrical enclosure mistakes that could end up costing you thousands and how to avoid them.


1. Choosing the Wrong Enclosure Material

rusted panel
The Mistake:

Selecting an enclosure that isn’t rated for its environment (e.g., using a NEMA 1 indoor enclosure in a corrosive or wet location).

The Cost:

Premature corrosion, short circuits, or electrical fires can lead to expensive replacements and downtime.

The Fix:
  • Indoor use: NEMA 1 (general purpose) or NEMA 12 (dust-tight)
  • Outdoor/wet locations: NEMA 3R (rainproof) or NEMA 4 (watertight)
  • Corrosive environments: Stainless steel or fiberglass (NEMA 4X)

2. Poor Ventilation & Heat Management

good ventilation
The Mistake:

Ignoring heat buildup inside the enclosure, leading to overheating of breakers, relays, and other components.

The Cost:

Reduced lifespan of electrical components, unexpected failures, and fire risks.

The Fix:

3. Incorrect Grounding & Bonding

incorrect grounding
The Mistake:

Improper grounding can cause electrical noise, equipment damage, or even shock hazards.

The Cost:

Damaged sensitive electronics, failed inspections, and potential liability issues.

The Fix:
  • Use proper grounding lugs and follow NEC Article 250.
  • Ensure all metallic enclosures are bonded to the grounding system.
  • Test ground resistance regularly (ideally below 25 ohms).

4. Overcrowding Wires & Components

The Mistake:

Stuffing too many wires and devices into a small panel, violating NEC fill capacity rules.

The Cost:

Overheating, difficulty troubleshooting, and potential code violations leading to fines.

The Fix:
  • Follow NEC wire fill calculations (Article 312).
  • Use larger enclosures or additional panels if needed.
  • Organize wires with cable management systems to improve airflow.

5. Neglecting Regular Maintenance

regular maintenance
The Mistake:

Failing to inspect and maintain electrical enclosures, allowing dust, moisture, or loose connections to go unchecked.

The Cost:

Unplanned downtime, costly emergency repairs, and increased risk of Arc flash incidents.

The Fix:
  • Schedule routine inspections (at least annually).
  • Check for corrosion, loose terminals, and worn gaskets.
  • Keep enclosures clean and sealed against contaminants.

Final Thoughts

Avoiding these five common electrical enclosure mistakes can save you thousands in repairs, fines, and downtime. Whether you're installing a new LOA voltage panel or maintaining an existing one, always:
✅ Choose the right NEMA-rated enclosure
✅ Manage heat & ventilation properly
✅ Ensure correct grounding & bonding
✅ Avoid overcrowding wires
✅ Perform regular maintenance

By following these best practices, you’ll enhance safety, compliance, and the longevity of your electrical systems.

Need help selecting the right enclosure? Contact our experts today for a consultation!

Saturday, January 20, 2024

How To Upgrade Electrical Service From 100 to 200 amps

"A Comprehensive Guide: Upgrading Your Electrical Service from 100 to 200 Amps"


Introduction:

In today's technologically advanced world, the demand for electricity in homes is higher than ever. If you find yourself frequently tripping breakers or experiencing power shortages, it may be time to consider upgrading your electrical service from 100 to 200 amps. This comprehensive guide will walk you through the steps of this essential home improvement, ensuring a smooth transition to a more robust and efficient electrical system.


Why Upgrade?

Before delving into the upgrade process, it's crucial to understand why upgrading from 100 to 200 amps is necessary. A 200-amp service provides increased electrical capacity, allowing you to meet the demands of modern appliances, electronics, and other power-hungry devices. This upgrade enhances safety, reduces the risk of electrical fires, and accommodates future expansions or renovations in your home.


Step 1: Assess Your Electrical Needs

Begin by evaluating your current electrical usage and needs. Consider the appliances and devices in your home, and factor in any planned additions or renovations. A 200-amp service is ideal for larger homes or those with extensive electrical requirements, such as high-capacity air conditioning systems, electric vehicle chargers, or advanced home automation systems.


Step 2: Obtain Necessary Permits

Electrical upgrades are not DIY projects; they require professional expertise and compliance with local building codes. Contact your local municipality to obtain the necessary permits for the upgrade. Working without proper permits can result in fines and may jeopardize the safety of your home.


Step 3: Hire a Licensed Electrician

Engage a licensed and experienced electrician to carry out the upgrade. A qualified professional will assess your current electrical system, develop a detailed plan, and ensure the installation adheres to local codes and regulations. Working with a licensed electrician ensures the safety and reliability of your upgraded electrical service.


Step 4: Plan the Service Panel Upgrade

The heart of your electrical system is the service panel. Upgrading from 100 to 200 amps involves installing a larger service panel that can accommodate the increased capacity. Your electrician will carefully plan the panel upgrade, ensuring it meets the specifications of your local electrical code.


Step 5: Upgrade Wiring and Circuits

In addition to the service panel, the wiring and circuits throughout your home may need upgrading to handle the increased electrical load. Your electrician will assess the existing wiring, replacing any outdated or inadequate components to guarantee the safe and efficient distribution of electricity.


Step 6: Install a New Main Breaker

The main breaker is a crucial component that protects your electrical system from overloads. With a 200-amp upgrade, a new main breaker will be installed to accommodate the increased capacity. This step is essential for maintaining the safety and reliability of your electrical system.


Step 7: Grounding and Bonding

Proper grounding and bonding are vital for electrical safety. During the upgrade, your electrician will ensure that your home is appropriately grounded and bonded, minimizing the risk of electrical shock and protecting your appliances and electronics.


Step 8: Inspections and Final Approval

Once the upgrade is complete, your local building department will conduct inspections to ensure that the work complies with safety codes and regulations. This final step is crucial for obtaining the necessary approvals and certificates for your upgraded electrical service.


Conclusion:

Upgrading your electrical service from 100 to 200 amps is a significant investment in the safety, efficiency, and functionality of your home. By following these steps and working with a licensed electrician, you can navigate the process smoothly and enjoy the benefits of a more robust electrical system. Don't compromise on safety and reliability—make the upgrade today and future-proof your home for the demands of tomorrow's technology.

Tuesday, October 24, 2023

Protecting Electrical Systems with Reliable Electrical Enclosures

Protecting Electrical Systems with Reliable Electrical Enclosures

In the realm of modern electrical infrastructure, the significance of durable and efficient electrical enclosures cannot be overstated. These enclosures are pivotal in safeguarding vital components from various external elements, ensuring the smooth functioning and longevity of electrical systems. From industrial facilities to commercial establishments, electrical enclosures play a pivotal role in ensuring safety and reliability. Let's delve into the world of electrical enclosures, their importance, types, and the factors to consider while choosing the most suitable one for your application.

electrician


The Importance of Electrical Enclosures

Electrical enclosures act as shields, guarding sensitive electrical components from harsh environments, dust, moisture, and other potentially damaging elements. By preventing the entry of foreign particles, they significantly reduce the risk of short circuits, electrical fires, and other hazardous incidents, thereby ensuring the safety of both personnel and equipment. Moreover, these enclosures help maintain the integrity of the electrical components, enhancing their durability and longevity, and reducing the need for frequent repairs or replacements.

Types of Electrical Enclosures

Electrical enclosures come in various types, each designed to cater to specific environmental conditions and industry requirements. Some common types include:

  1. Wall-Mount Enclosures: These are typically used for applications where floor space is limited. They are mounted directly on walls and are available in various sizes to accommodate different equipment.

  2. Freestanding Enclosures: Ideal for housing larger equipment, freestanding enclosures offer more internal space and often come with additional features such as cable management and ventilation options.

  3. Modular Enclosures: Known for their flexibility, modular enclosures allow for customization and expansion as per specific needs. They are particularly useful in industries with evolving requirements.

  4. Stainless Steel Enclosures: These are preferred in environments where corrosion and rust are major concerns. They offer high resistance to harsh chemicals and are suitable for industries such as food processing, pharmaceuticals, and marine applications.

Factors to Consider when Choosing Electrical Enclosures

Selecting the right electrical enclosure is crucial for ensuring the long-term performance and safety of electrical systems. Here are some key factors to consider:

  1. Environmental Conditions: Evaluate the surrounding environmental factors such as temperature, humidity, and exposure to chemicals to determine the level of protection required.

  2. Size and Space Requirements: Consider the dimensions of the electrical components to be housed and the available space for the enclosure to ensure a proper fit.

  3. Material and Durability: Choose materials based on the environmental conditions and the level of protection required. Stainless steel, aluminum, and polycarbonate are common materials known for their durability and corrosion resistance.

  4. IP (Ingress Protection) Rating: Check the IP rating to ensure the enclosure is suitable for the intended environment. Higher IP ratings indicate better protection against dust, water, and other foreign objects.

  5. Compliance with Industry Standards: Ensure that the chosen enclosure complies with industry-specific standards and regulations to guarantee the safety and reliability of the electrical system.

Conclusion

Electrical enclosures are an integral component of any electrical system, providing protection and ensuring the smooth functioning of critical equipment. By understanding the importance of these enclosures, the available types, and the key factors to consider when selecting one, you can make an informed decision that will enhance the safety and efficiency of your electrical infrastructure. Invest in high-quality electrical enclosures to safeguard your electrical systems and promote a secure working environment.